Deploying a .NET Framework WebJob to Azure is easy enough, but as of writing this blog the tooling is lacking for .NET Core. Many organizations are making it an initiative to migrate their .NET Framework projects to .NET Core which is a good idea. The tooling limitation for .NET Core WebJobs should not be a barrier, following this guide you will be able to deploy your .NET Core WebJobs to Azure
.NET Framework WebJob
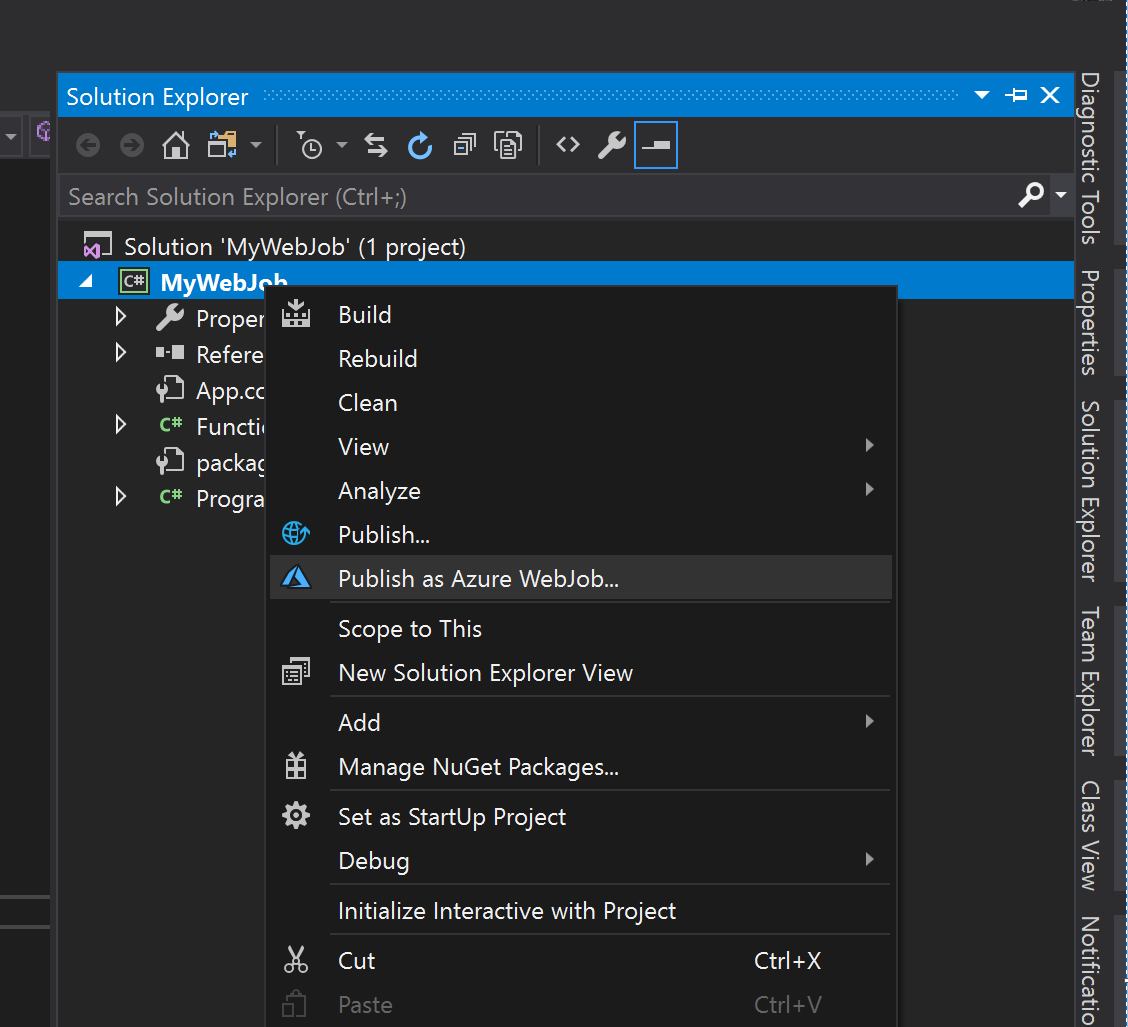
You are most likely starting with a .NET Framework based WebJob that has tooling through visual studio and easy to use deployment using Visual Studio or Azure DevOps. When deploying this code there is tooling in Visual Studio that makes this really easy. One of the first things I noticed when working with .NET Core based WebJobs was the Publish to Azure button was no longer available.
Publish to Azure Tooling for .NET Framework WebJob
Deployment: How Does It Work?
Before we can start building our .NET Core WebJob let’s take a look at an actual deployment of a .NET Framework WebJob to Azure. We are going to start simple and just use Visual Studio.
If you would like to follow along with your own Azure Account you will need some items configured before we begin.
Pre-reqs
- Azure Web App
- Azure App Service Plan (we used a shared plan for this demo)
- Azure Storage Account (we used v1 storage for this demo)
Publish The WebJob
Once you get your Azure Resources created we can start by downloading the code and publishing it out to Azure.
https://github.com/HoeflingSoftware/DotNetCore-WebJob/tree/net-framework
- Clone the source code
- Build the project
- Right-Click on project and click ‘Publish as Azure WebJob’
- A wizard will appear which will walk you through publishing your WebJob to the resources you just created
Open up the Azure portal so we can investigate what our deployment looks like
WebJobs
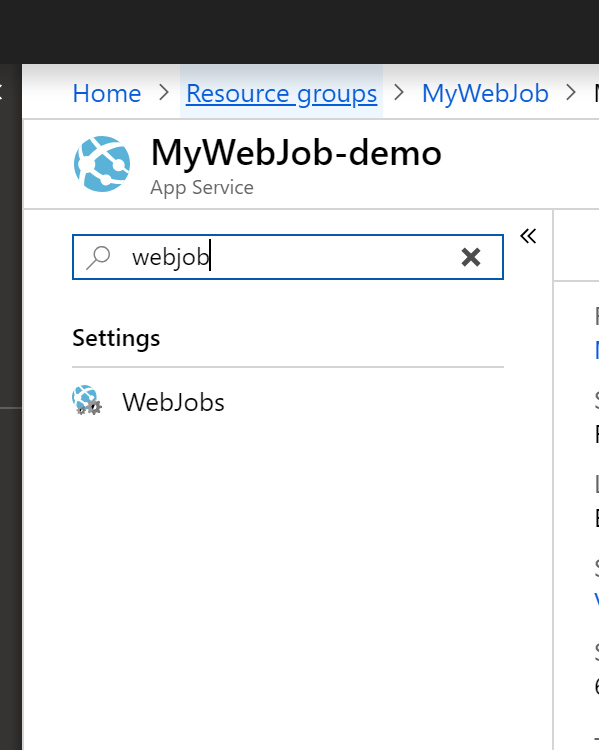
Open up the Azure Web App we created earlier and search for the WebJobs blade. The screenshot below shows you what you are looking for.
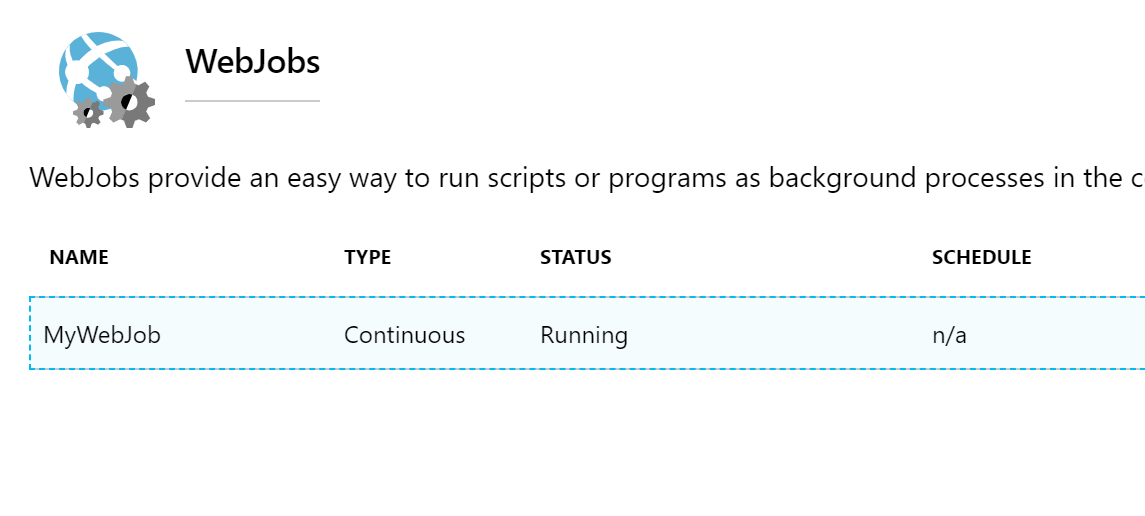
You will be brought to a screen that looks like this with your WebJob running
This means our WebJob is running correctly and this is the page where you can investigate the WebJob logs if something goes wrong.
Deployment Location
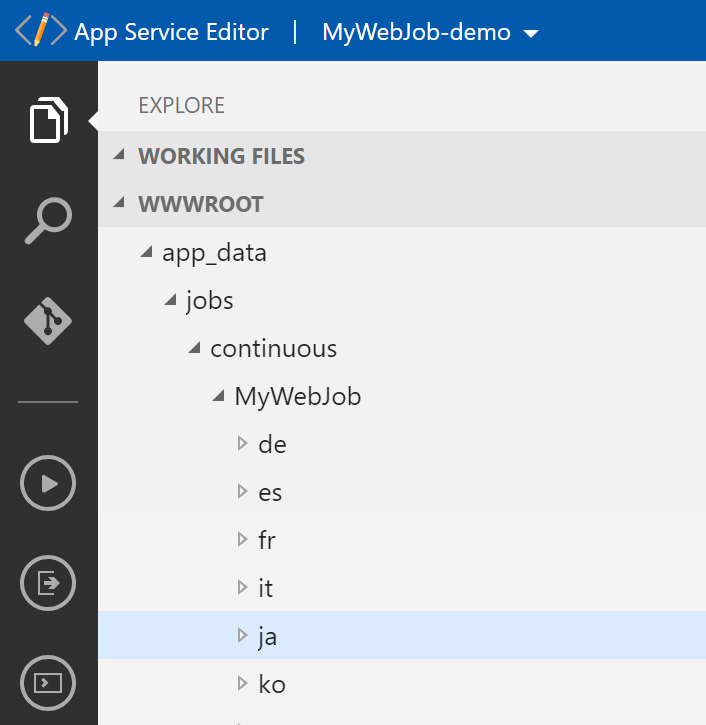
Since we verified our WebJob is running we know the deployment happened successfully and we can investigate where our WebJob was deployed. In the WebApp Overview search for the ‘App Service Editor’.
Findings
After looking through our deployed WebJob there is 1 very big finding that we need to keep track of:
destination path: /app_data/jobs/continuous/MyWebJob
.NET Core WebJob
We don’t have any of the easy tooling to publish our WebJobs for .NET Core like we do with .NET Framework, but with a little planning we can publish our WebJobs and get all the benefits of using .NET Core.
The Strategy
- Build WebJob for .NET Core
- Run Publish command to get file structure
- Alter folder structure to match what Azure is expecting for a WebJob
- Create Startup Script
- Run a folder based WebDeploy
Designer Pipeline
Start building your pipeline in the designer.
Restore and Build
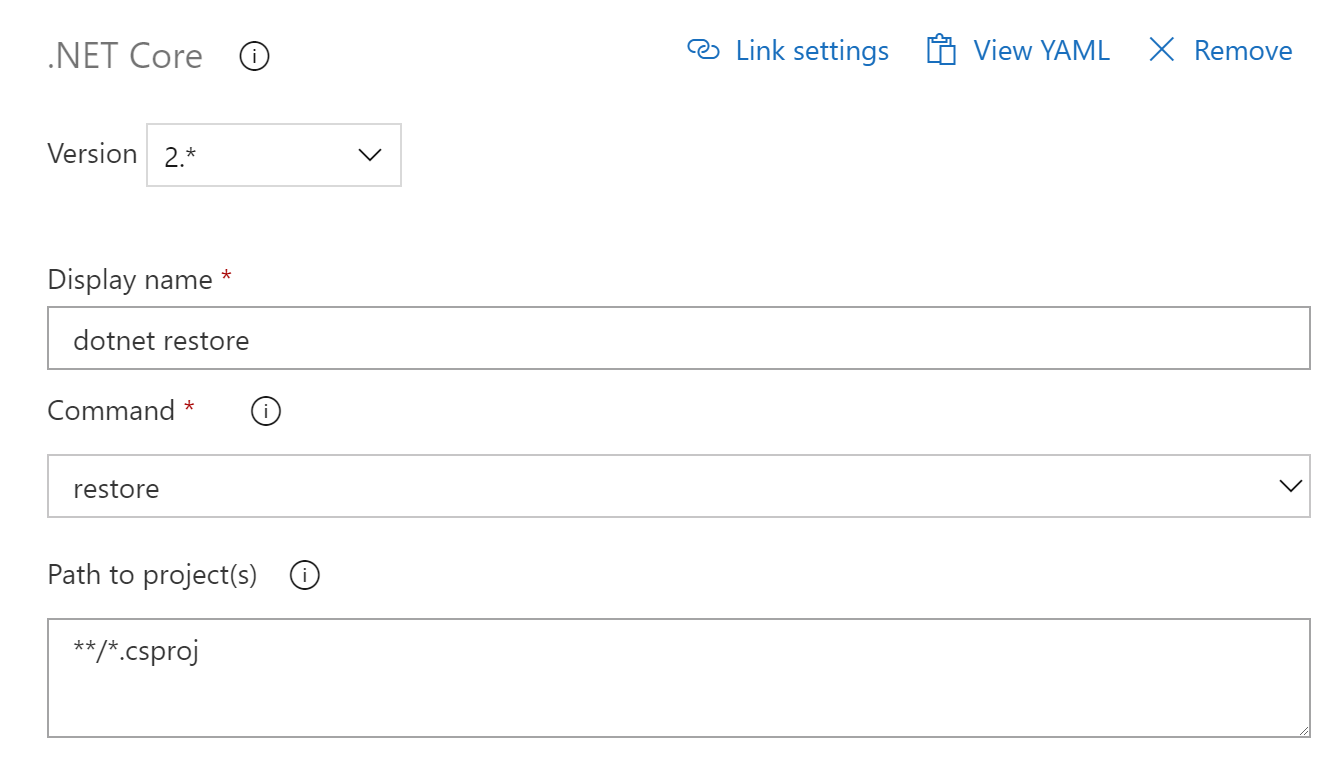
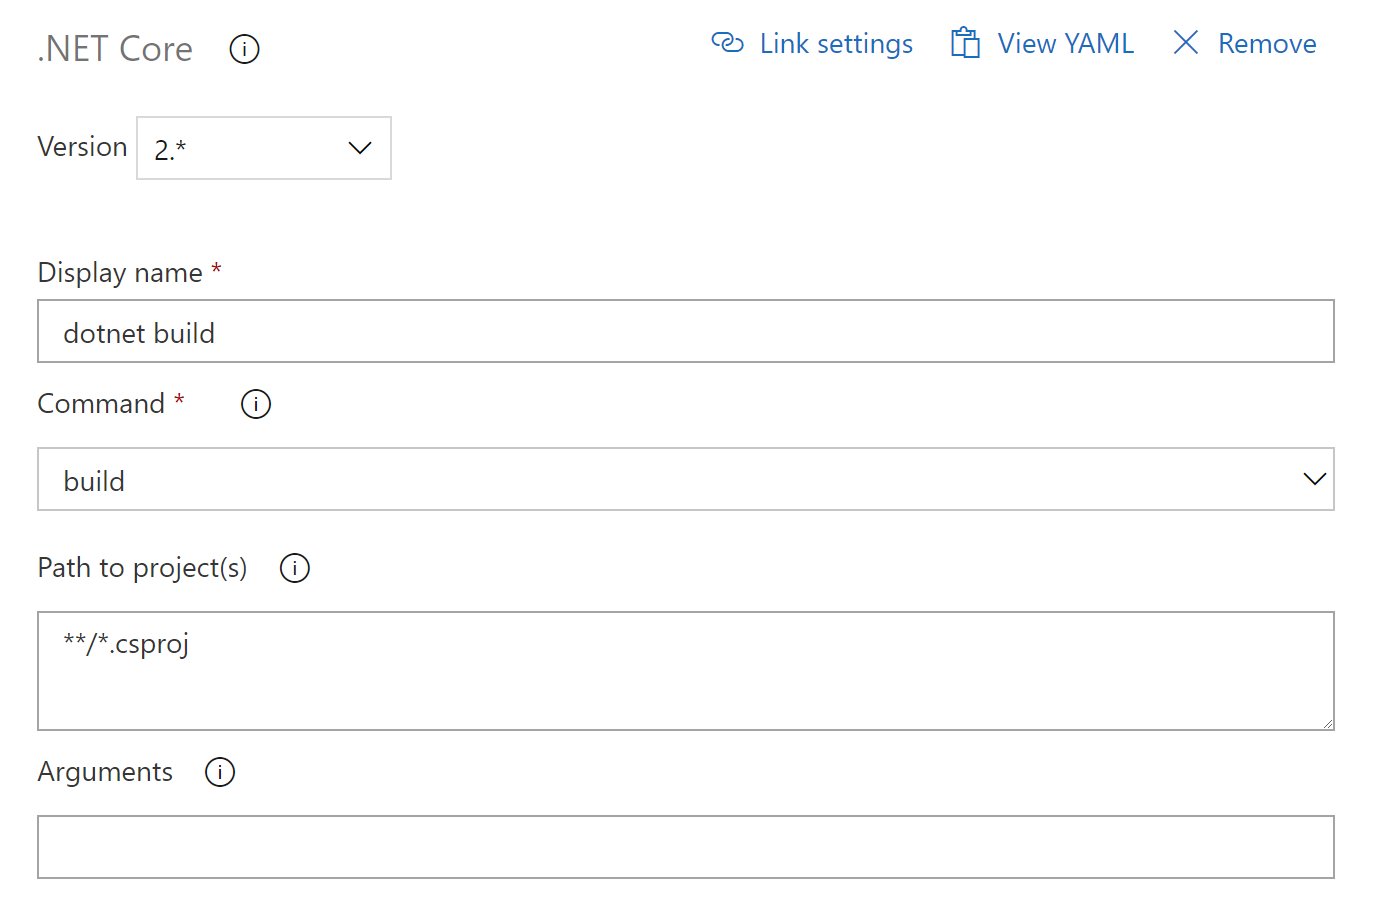
Add your standard dotnet restore and dotnet build tasks. There is no additional customization on these steps.
Publish
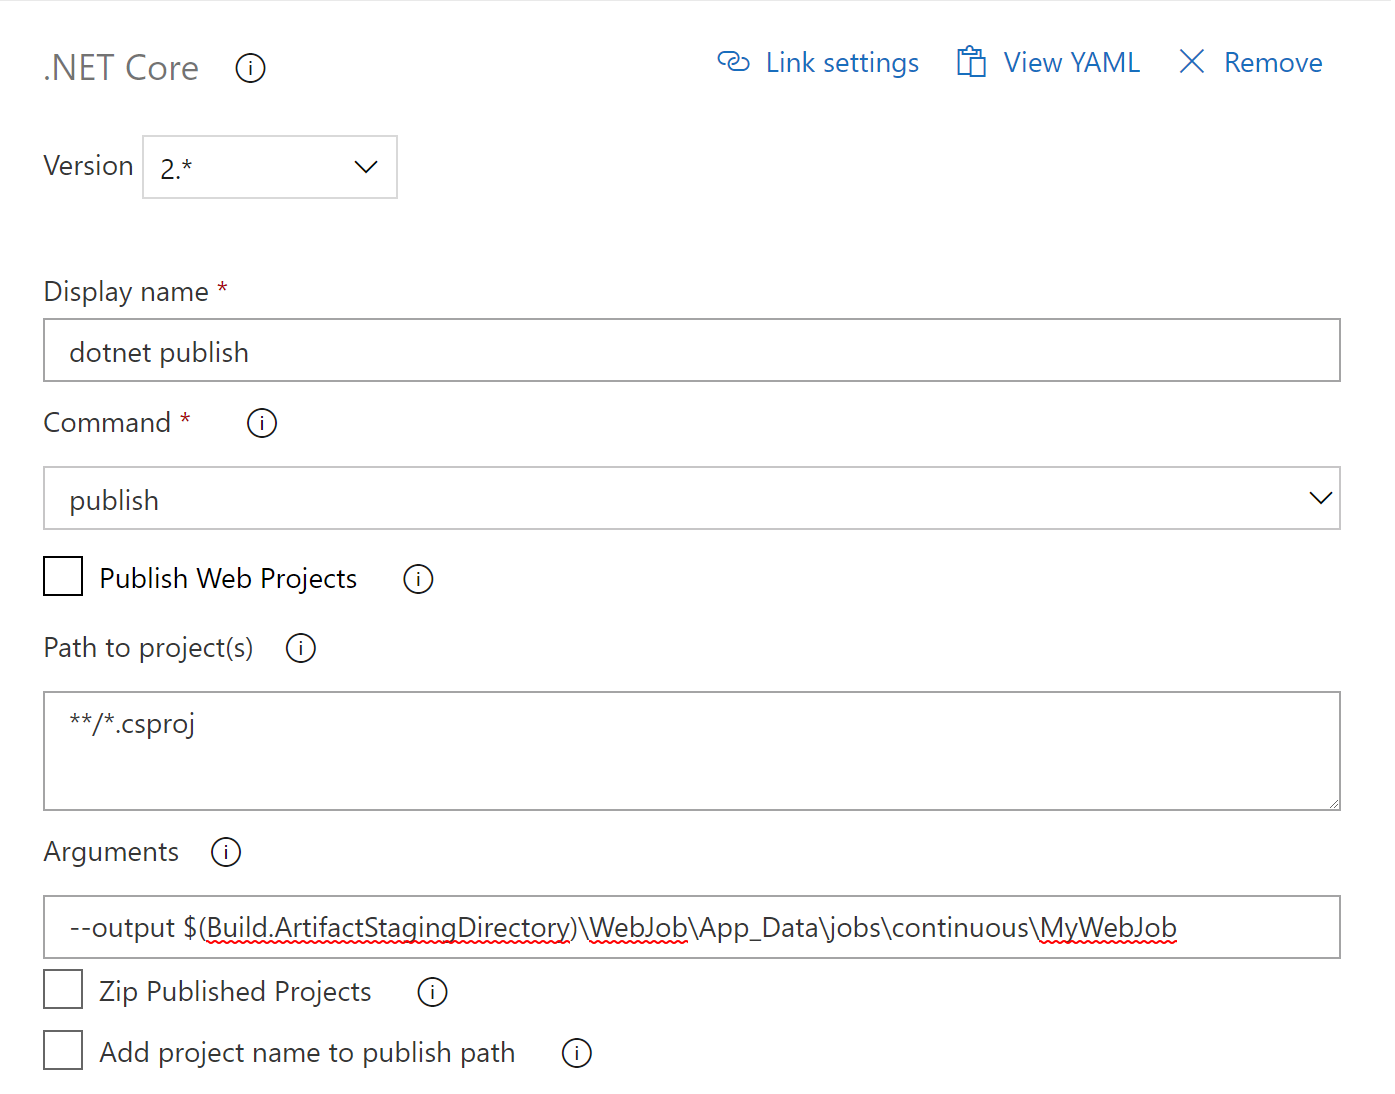
When we publish our project we need to customize the output path for the Web Deploy. In arguments add the following snippet:
1
--output $(Build.ArtifactStagingDirectory)\WebJob\App_Data\jobs\continuous\MyWebJob
Important Flags to Check/Uncheck
- Uncheck - Zip Published Projects
- Uncheck - Add Project name to Publish Path (we are explicitly setting it in –output)
To get this to work we need to run a Folder Deploy. That is why we are electing to uncheck Zip Published Projects.
Create Startup Script
THIS IS VERY IMPORTANT DO NOT SKIP
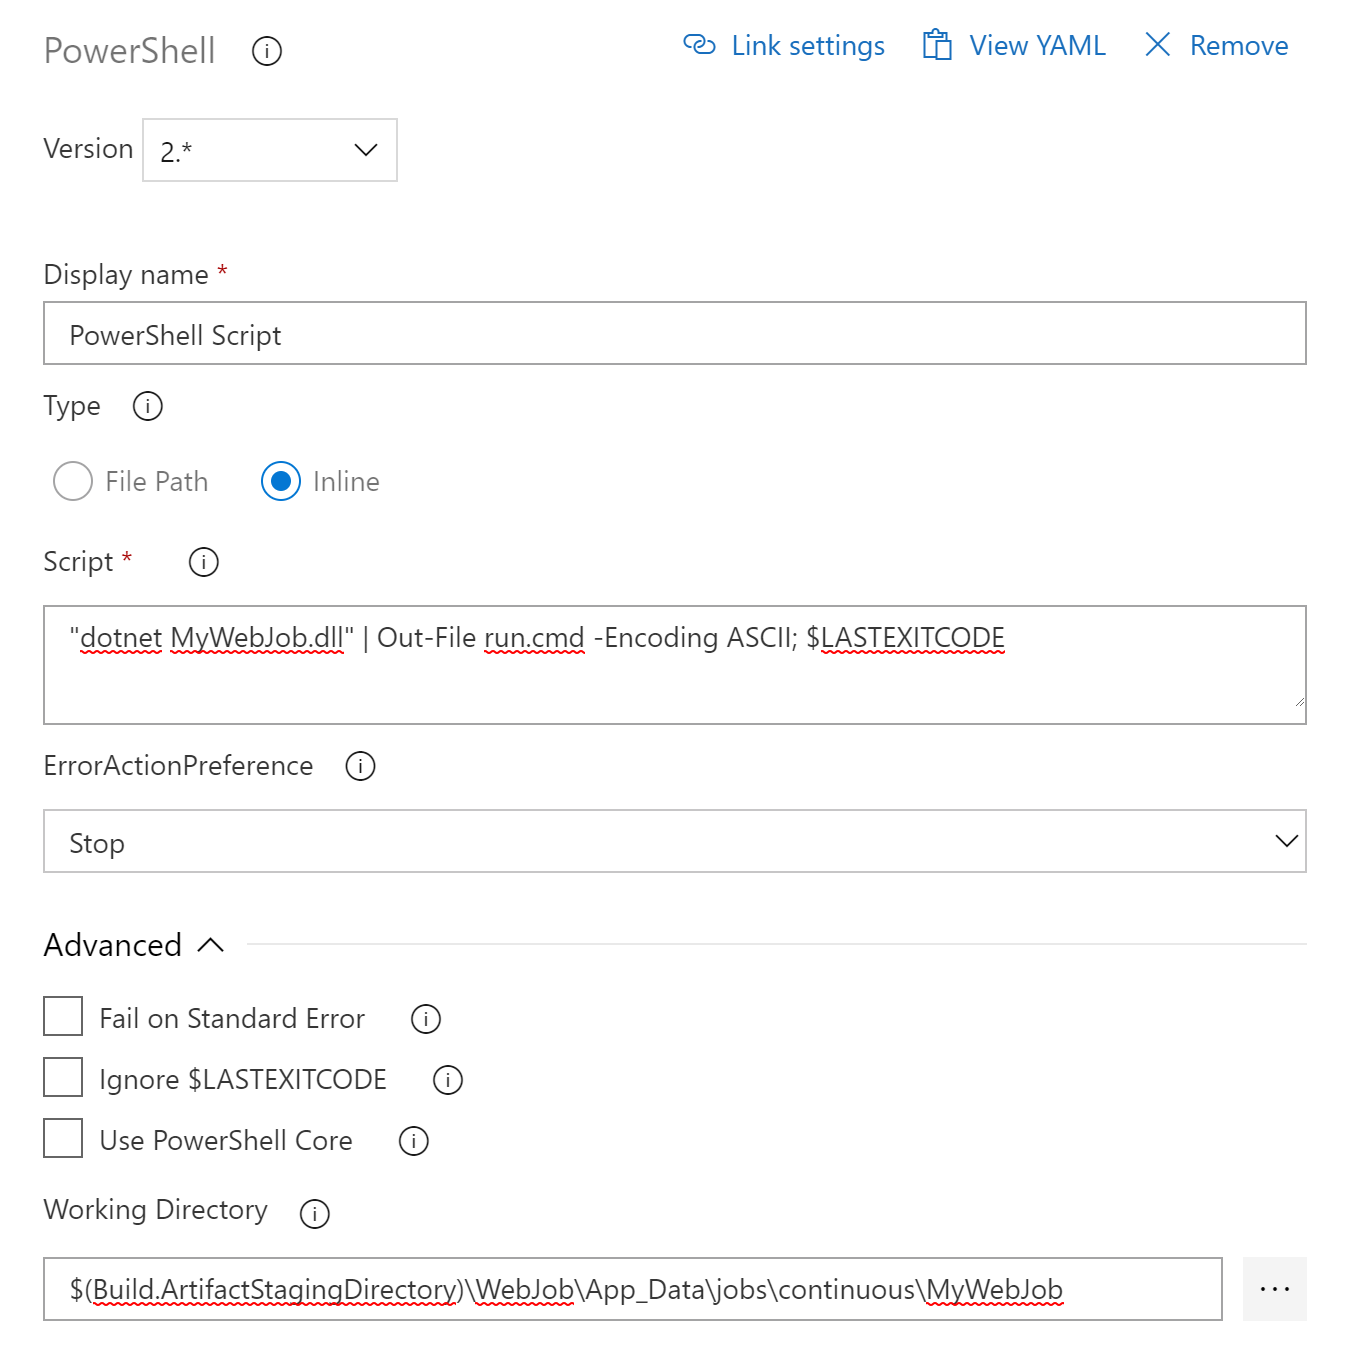
Upon deployment of our WebJob to Azure the first thing that happens is Azure will look for a startup script to execute. If there is no startup script the WebJob will not start automatically and you will need to start it manually. The startup script is very simple and we typically have a build step generate it for us.
The startup script generates a run.cmd script the executes the following command
1
dotnet MyWebJob.dll
Important:
Make sure you set the working directory to the correct location or the run.cmd won’t be in the correct spot
1
$(Build.ArtifactStagingDirectory)\WebJob\App_Data\jobs\continuous\MyWebJob
Azure Stop/Start
Before you do any deployment to Azure it is a good idea to stop the service, execute the deployment and then start the service up. This will prevent any files from being locked during the deployment.
- Stop Web App
- Deploy Code
- Start Web App
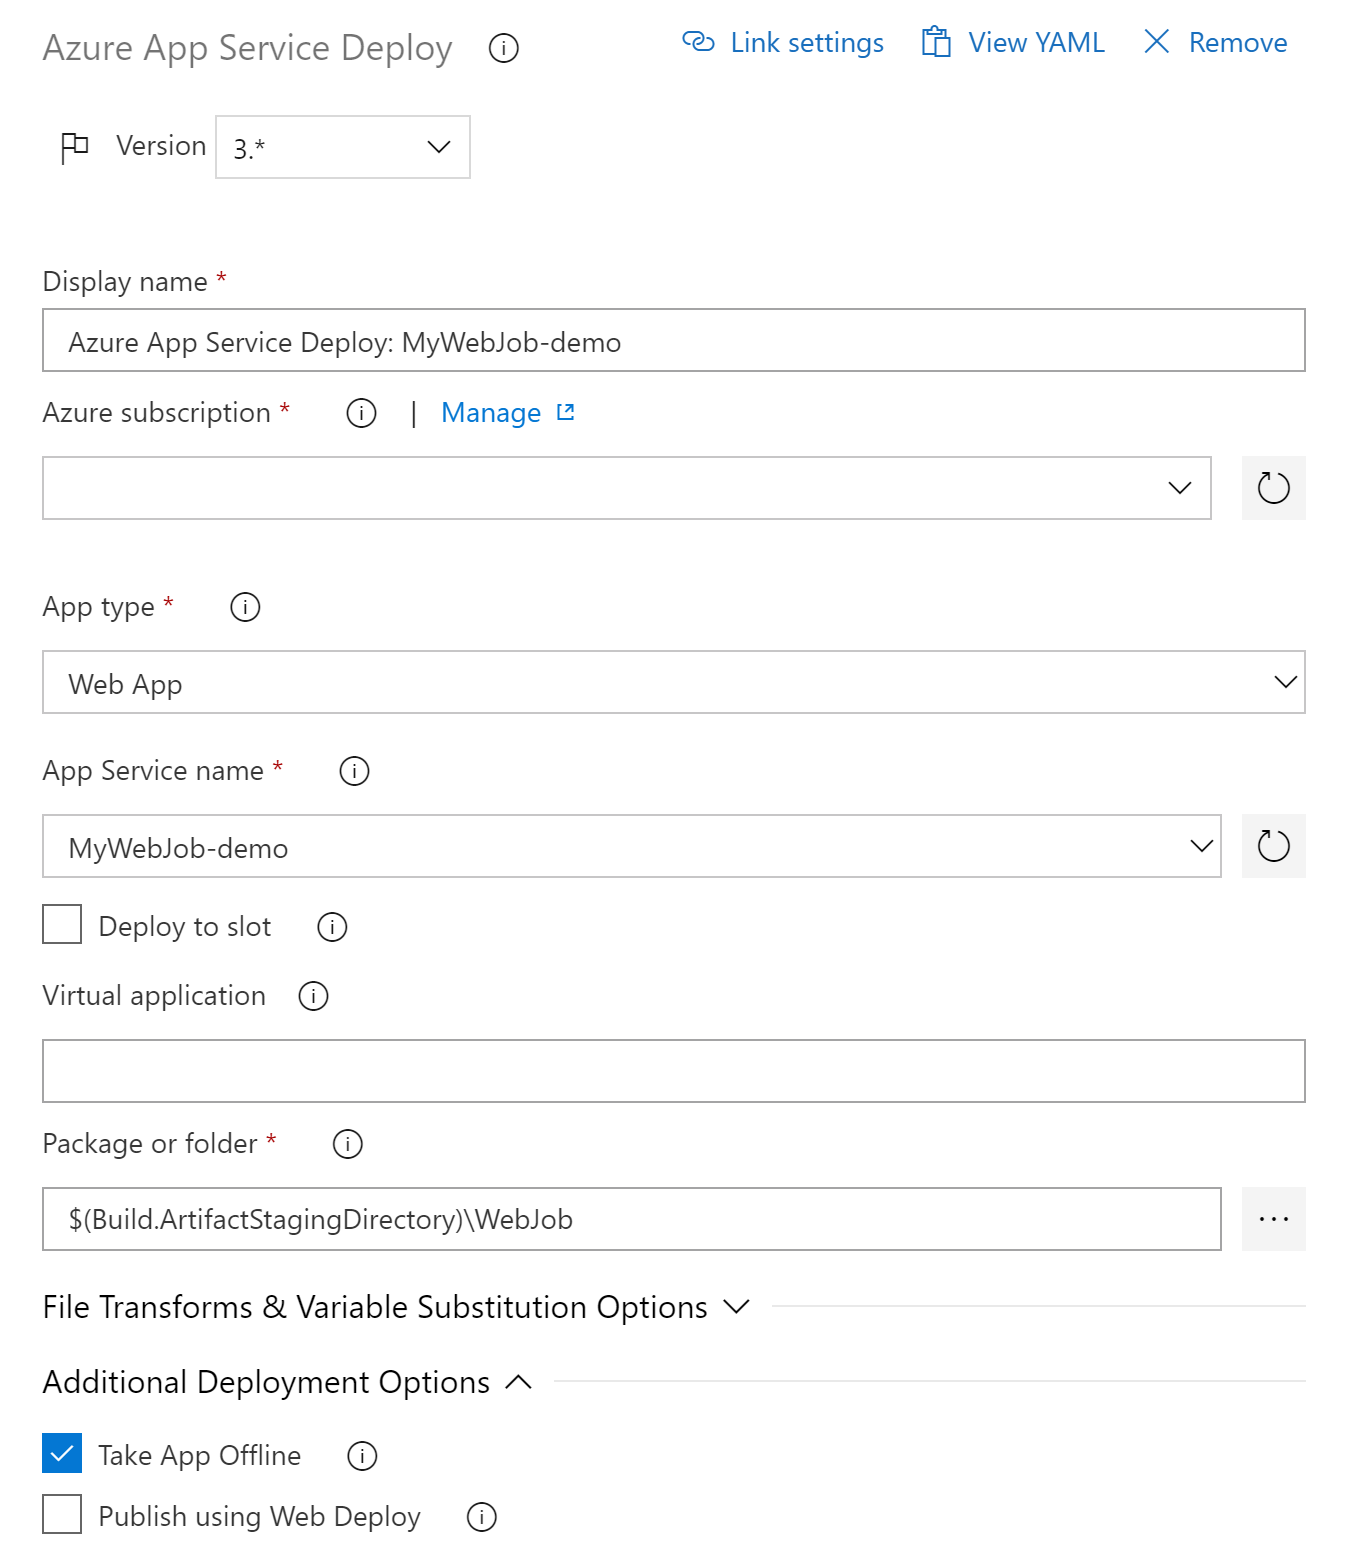
Azure Web Deploy
Everything is in place and you can run the Web Deploy step which is going to be different than how Web Deploy typically works. In most cases the dotnet publish command will generate a *.zip file that will be used by the Web Deploy task. Since we had to manipulate the folder structure and add a cusotm startup script this will not work for us.
We will be configuring Azure Web Deploy to use Folder Deploy.
Important Arguments
- Package or Folder - $(Build.ArtifactStagingDirectory)\WebJob
- Publish Using Web Deploy - False
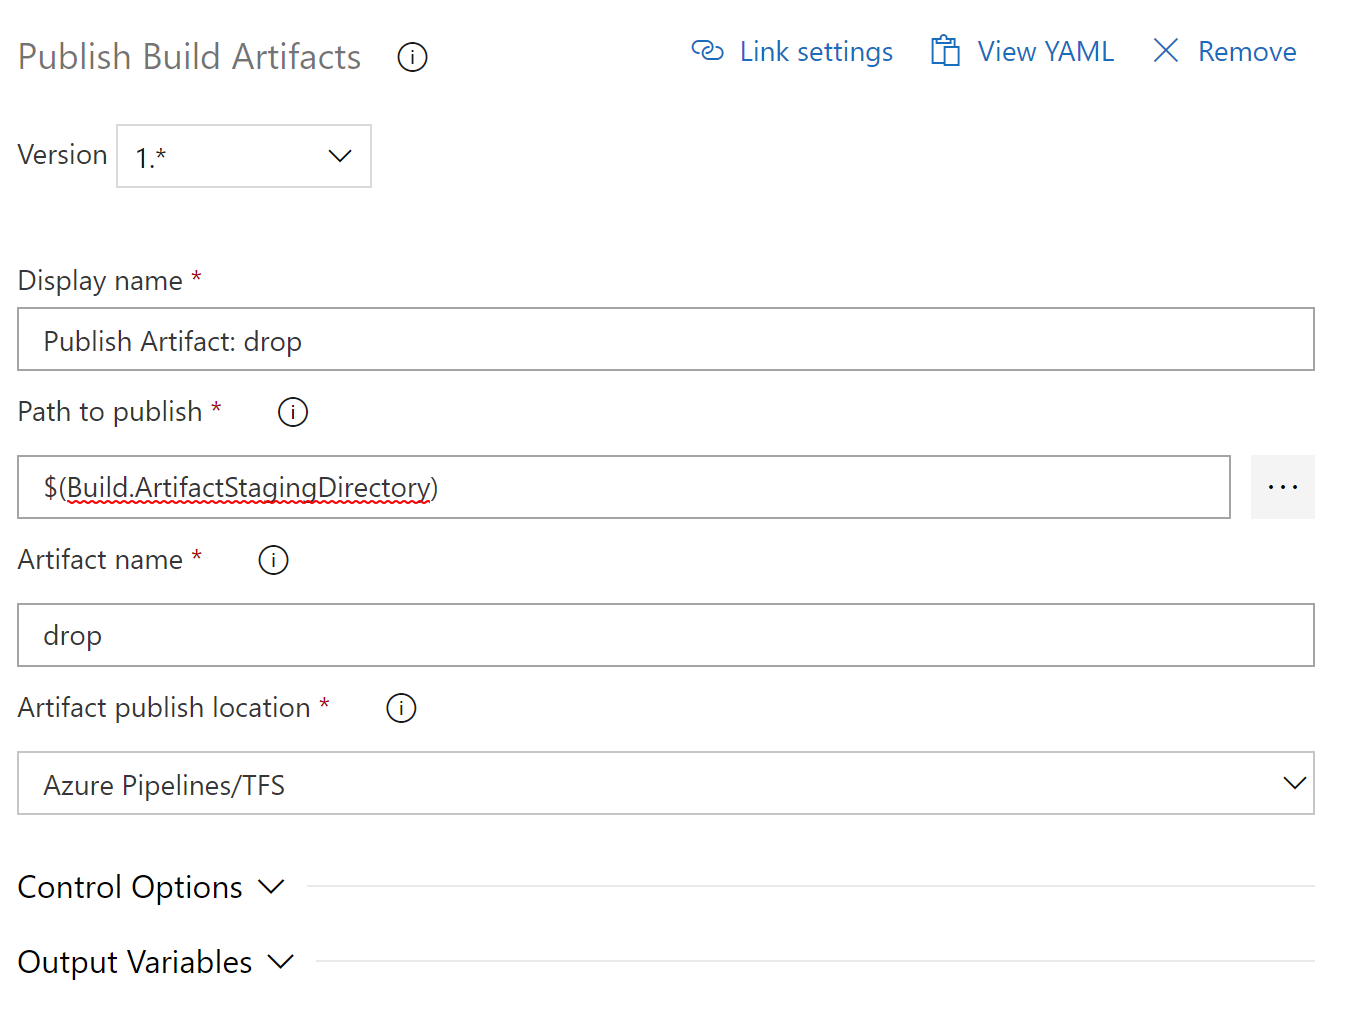
Publish Artifacts
It is always a good practice to publish your build artifacts somewhere you can look at them. This will help with re-deploying code if something gets corrupted.
Arguments:
- Path to Publish: $(Build.ArtifactStagingDirectory)
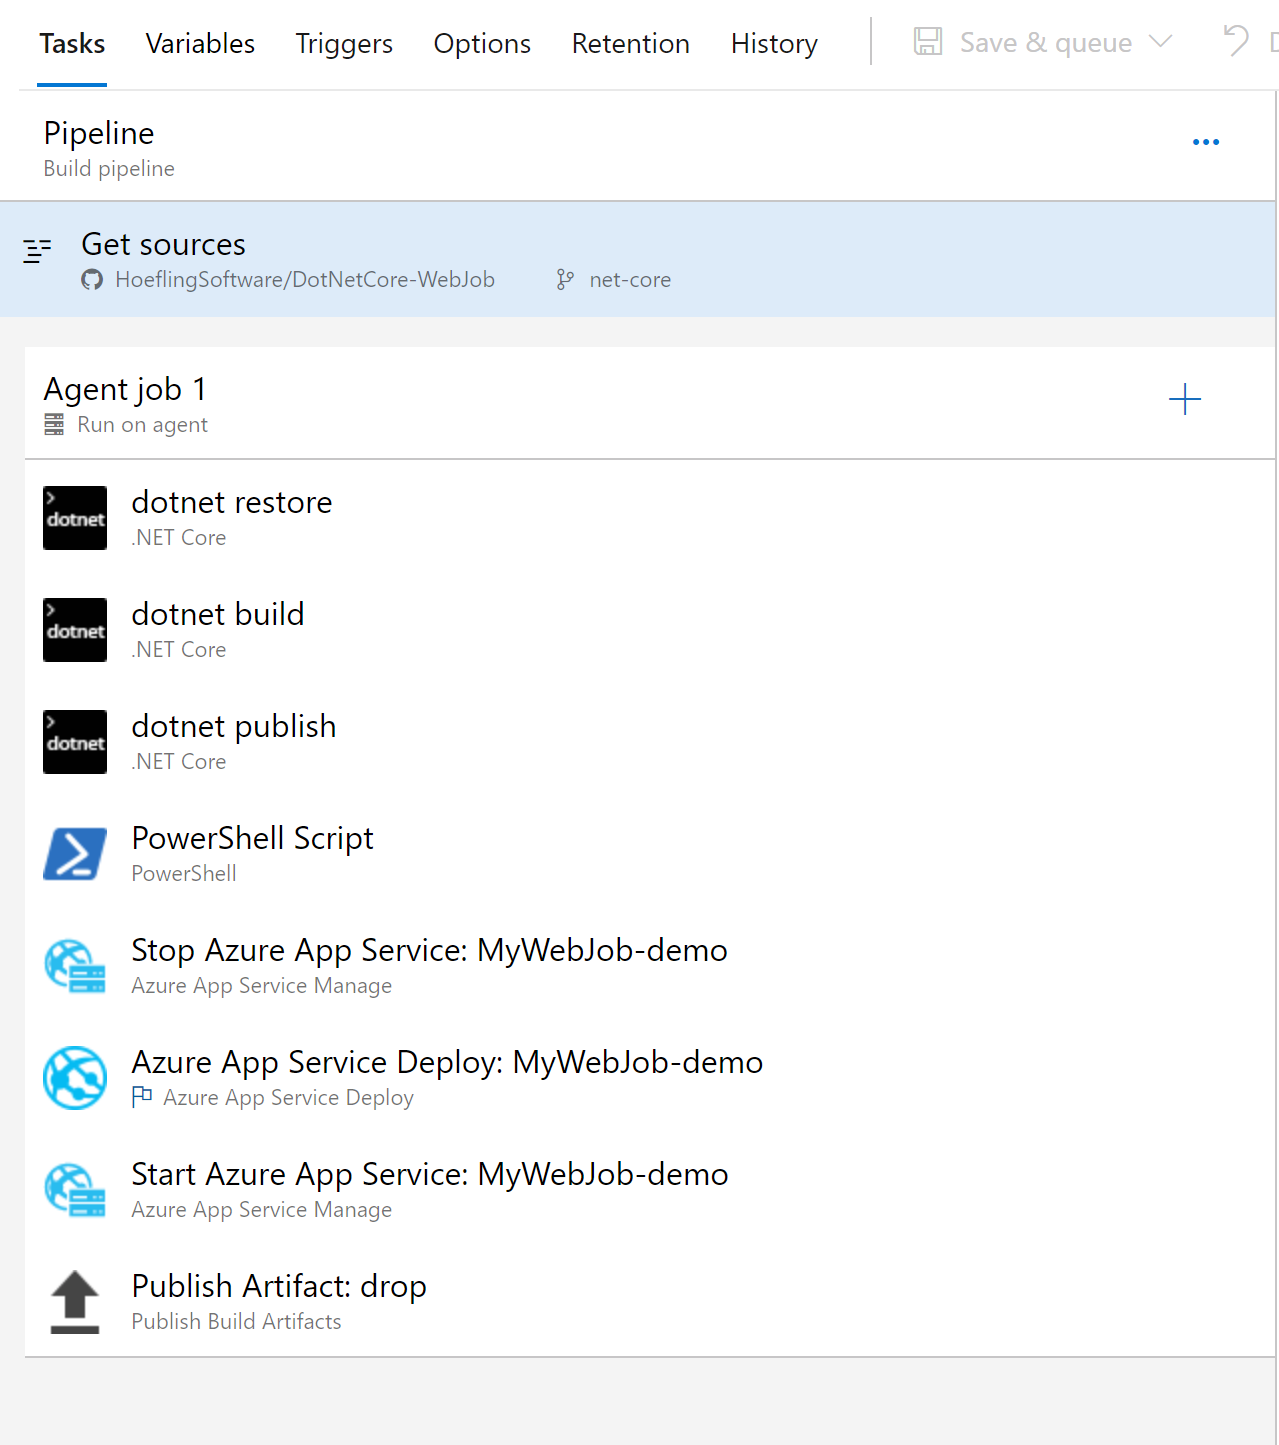
Complete Build Pipeline
Putting everything together here is what your build pipeline should look like:
- dotnet restore
- dotnet build
- dotnet publish
- Powershell Script - create startup script
- Stop Azure App Service
- Deploy Azure App Service
- Start Azure App Service
- Publish Build Artifacts
Conclusion & Code Samples
Take a look at our code samples for both the NET Framework and NET Core WebJob we used in this walk through
