Hosting apps in the cloud is common practice due to it’s ease of use and performance that smaller organizations may not have on their own. Why not host DNN in the cloud? If you follow our guide here you can be up and running in Microsoft’s Azure Web App in a matter of minutes.
The DNN Image
The Microsoft Azure DNN Image as of right now is out of date at version 7 of DNN and while it may be tempting to use it to get up and running I wouldn’t recommend it, as you will run into headaches. As of writing of this article DNN is at 9.2.1 and when I install a new instance of DNN I always use the latest version to get the latest and greatest features including security updates.
What Are The Options
Microsoft Azure supports 2 types of installations for this:
- Virtual Machine
- Web App/Azure SQL
Virtual Machine
The virtual machine approach forces you to manage your instance of Windows Server and any tool you have installed. Azure will not handle anything for you and in my opinion you really don’t get a lot of benefit from this especially with the price point of the Virtual Machine.
Some things to keep in mind if you choose to go the Virtual Machine route, you need to install the following items onto your machine and have the proper licenses for each:
- IIS
- Microsoft SQL Server
- Any security patches or general hot fixes that aren’t on the default Windows Server Image
Web App & Azure SQL
A Web App is an easy way to manage your deployed applications in Azure as they manage the underlying Virtual Machine for you and keep it up to date. You just worry about deploying your software.
The same concept applies for Azure SQL, you don’t need to manage your Microsoft SQL Server license, installing it or keeping it up to date. Azure handles all of this for you and all you need to do is worry about your SQL connection strings.
This is a very brief description of Azure Web App and Azure SQL, if you want to learn more about them take a look at the Microsoft Docs
Getting Started
Let’s get started, this really should only take you 5-15 minutes to get everything configured + however long the installation of DNN takes. We need to create 2 resources in Azure to get this working correctly.
- Azure SQL
- Azure Web App
Configure Azure SQL
Let’s get started and head over to the Azure Portal and we can get started by adding a new Resouce.
- Find the Create a resource button
![/assets/img/2018-08-14/azure-create-resource.png]()
- Search for “SQL Database”
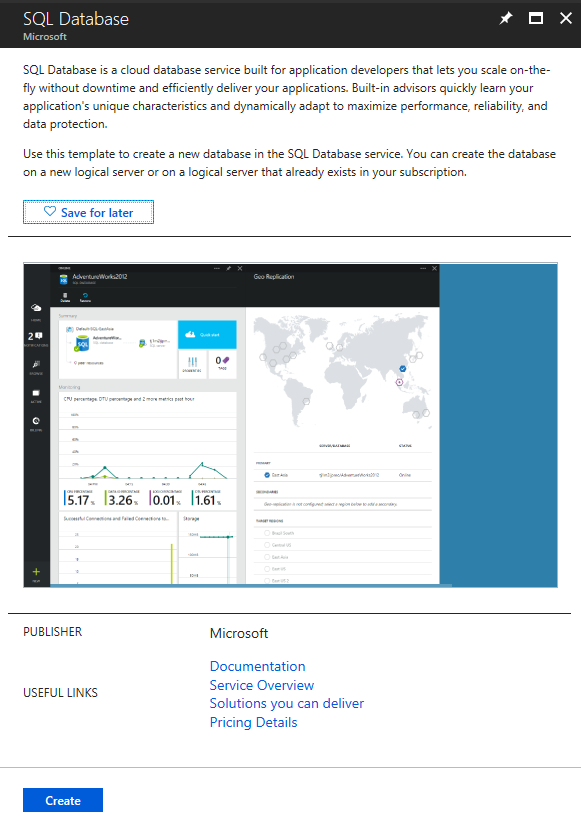
- Once you find the SQL Database select it and hit the Create button on the information blade
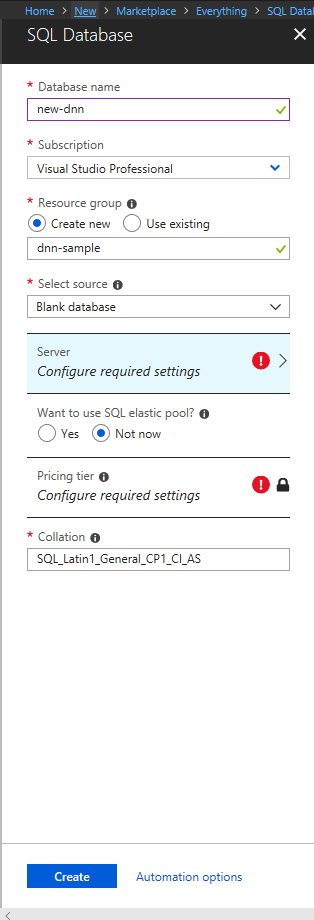
At this point the SQL Database configuration blade will appear and you can start filling in your desired information.
Before we can properly create our SQL Database we need to configure the Server and the pricing tier. By selecting the blade for each you will have more configuration options you will need to fill out.
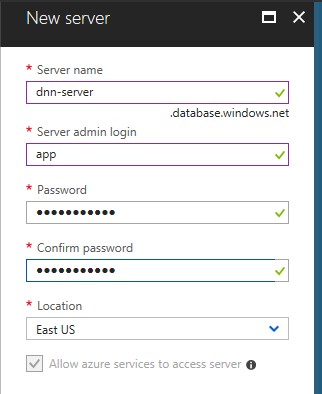
I opted to create a new SQL Server for our article here. Make sure you write down or remember your server admin login because you will need it later when we are running the DNN Install
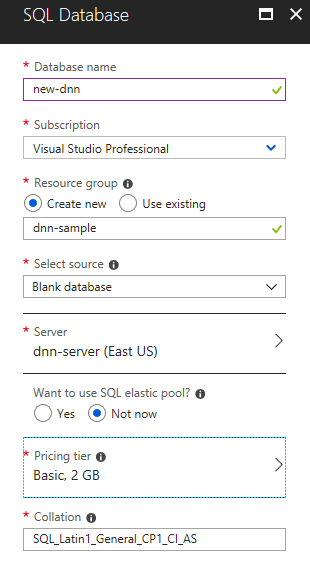
Once you have your server created you can go ahead and specify your Pricing Tier. When I am getting started with a new SQL Server I always start out at the most basic level until I need to scale up.
Here is what my final SQL Database configuration looks like before I hit the create button
At this point we are all set and we can hit the create button. Azure will start creating the necessary resources for you which in our case will be 2 items:
- Azure SQL Server
- Azure SQL Database
While the resources are being created we can move on to creating our Web App
Configure Azure Web App
We now need to create a resource that will contain the Web App Code for our DNN installation. In other words a place to install the DNN website itself. This will be the Azure Web App and once we configure it we can easily copy over any DNN Installation files via ftp. Let’s get started by logging into the Azure Portal if you are not already logged in
- Again, find the create resource button
![/assets/img/2018-08-14/azure-create-resource.png]()
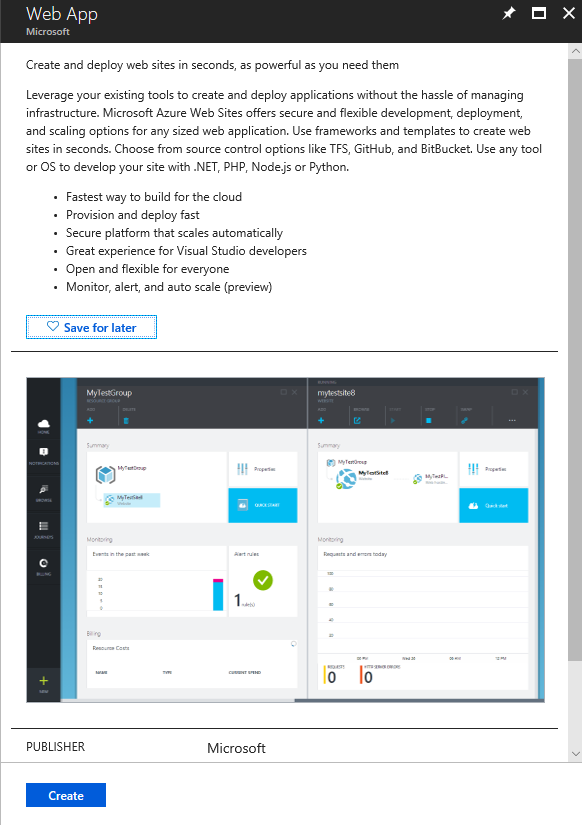
- Search for “Web App”
- The information blade should look like this
- Click the Create Button
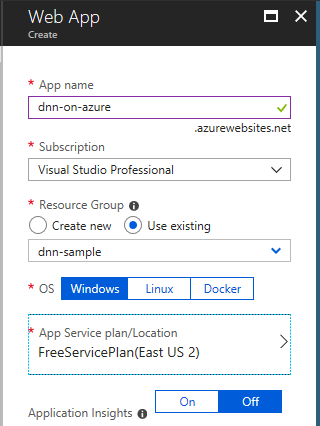
You will now be brought to the Web App Configuration Blade, this one is slightly easier to fill out from the SQL Server. Here is how we filled our out for this demo:
Note the following important properties:
- OS - This has to be Windows since DNN only works on Windows
- App Service Plan - You will need to configure your service plan, we are using a free plan
After you click the create button it will start creating your Web App Resources.
Transfer DNN Files onto Azure Web App
We aren’t done configuring the Web App in Azure yet because it doesn’t know anything about DNN, it just knows that it is a Web App waiting to accept some code to run. Let’s first head over to the DNN GitHub Repository Releases and download the latest “_install.zip” release. This contains the installer code we need to properly install DNN.
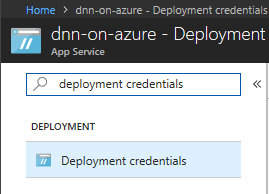
Once you have the installer head back to the Azure Dashboard and find the Web App you just created, it should be ready to use at this point. First thing is first, we need to configure our FTP/Deployment Credentials. Search for Deployment credentials and open the blade up:
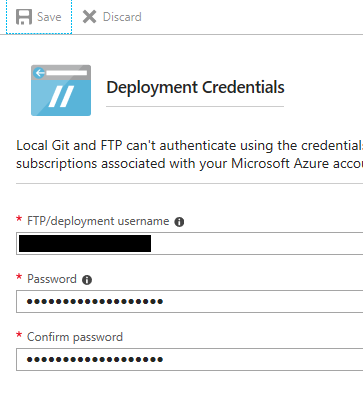
Enter your user name and password you would like and click the save button
Now we can open the FTP client of our choice and copy over the files we need. Back at the Web App Overview Blade you will see information about accessing the FTP Server. In our case it is
Username: “dnn-on-azure\skye-dnn-sample”
Host: “ftp://waws-prod-bn1-029.ftp.azurewebsites.windows.net”
Once you connect, you will need to navigate to the “site/wwwroot” folder. This is where you will copy the DNN Installation code to. I’m using FileZilla but feel free to use your favorite FTP client. We need to unzip the _install.zip file and then copy the contents of the file into the wwwroot folder.
Before you copy everything over you may need to delete a hostingstart.html file. It is a best practice to clean this directory before copying any website code over.
Once everything has been successfully copied over we can start the installation process!
Execute the DNN Installation
Now that everything is configured we are ready to start our DNN Installation. I hope you kept the SQL Server Credentials handy because we are going to need it to complete the installation. Let’s get started by navigating to your Azure Website URL which can be found in the Web App Overview Blade. In our case it is https://dnn-on-azure.azurewebsites.net
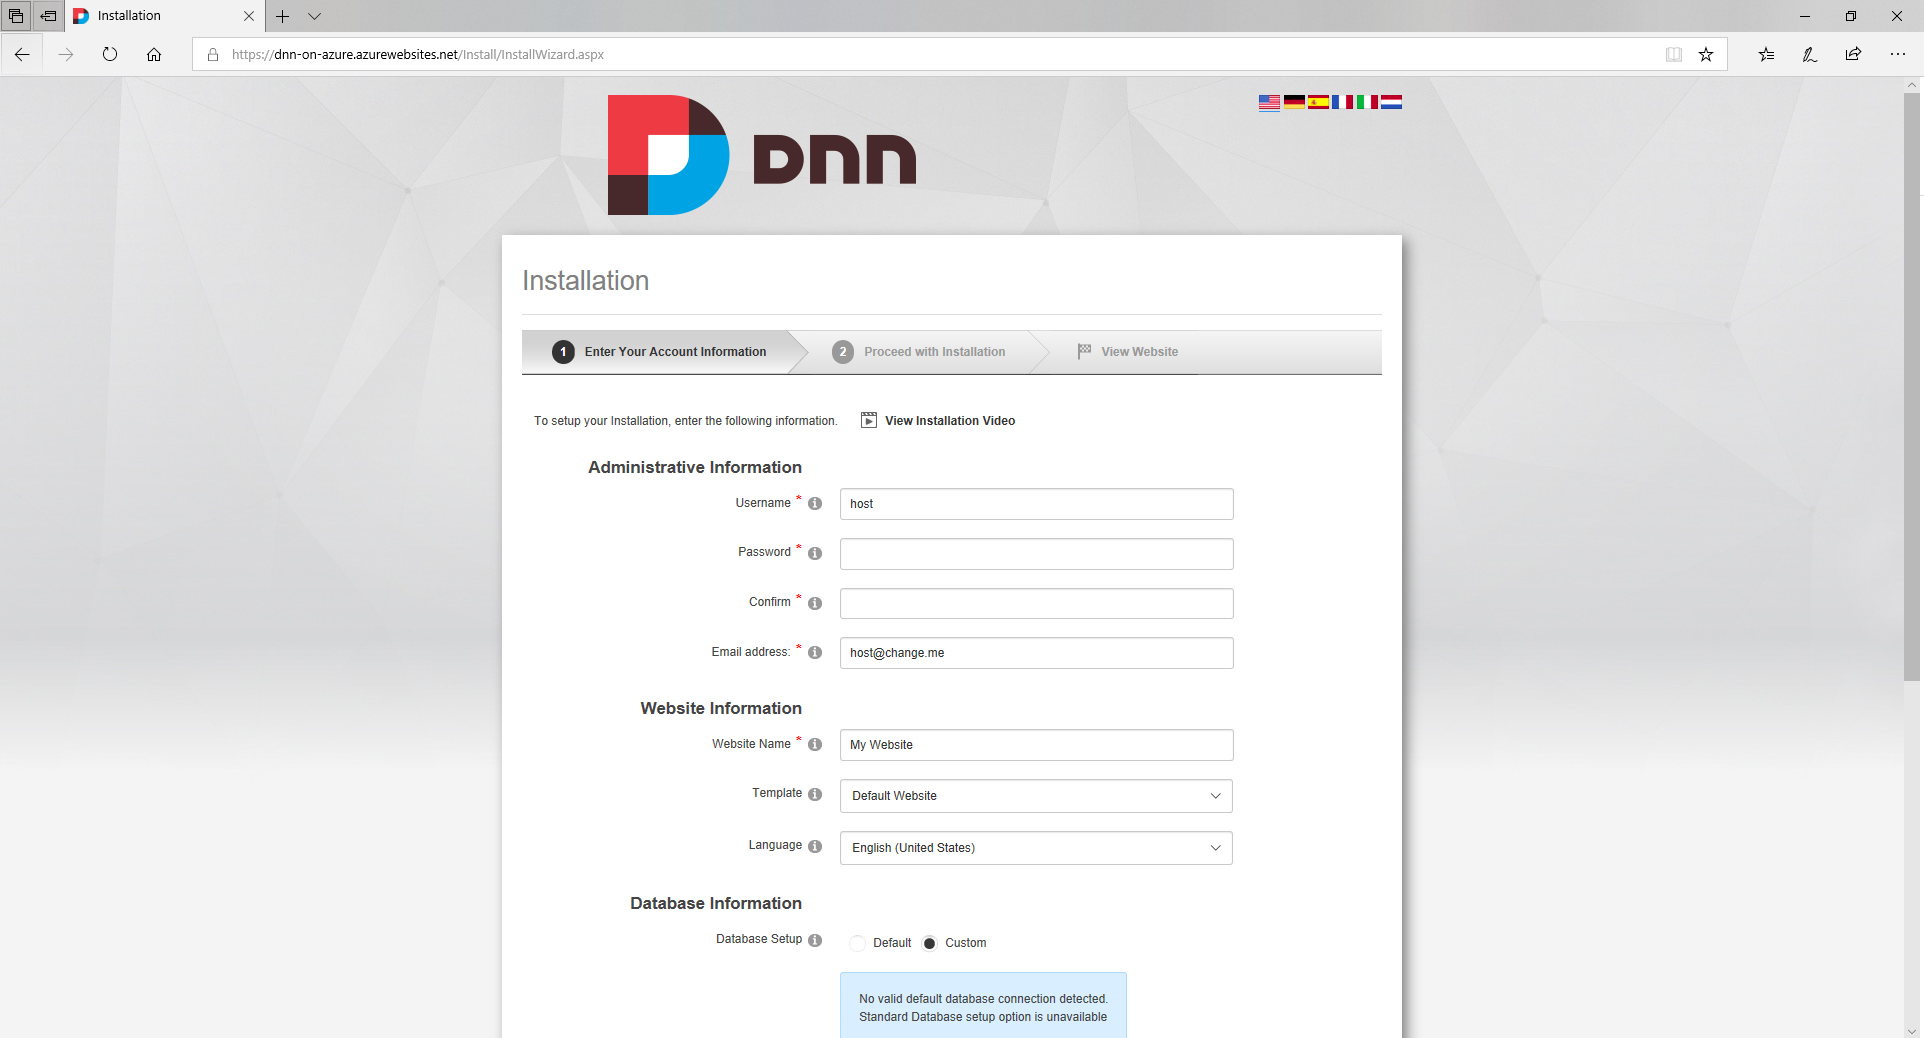
You should see the standard DNN Installation Screen, fill it out as you would normally. Just make sure to fill out your SQL Server Connection.
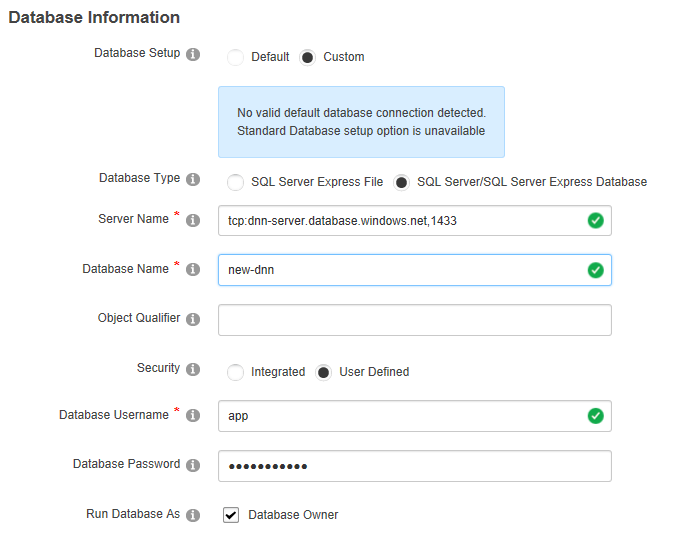
As you fill out the standard DNN Installation be sure to check “SQL Server/SQL Server Express Database” for your database type. You will find the server name from the SQL Database Server Overview Blade in Azure. Here is the information we entered for our install:
- Server Name - “tcp:dnn-server.database.windows.net,1433”
- Database Name - “new-dnn”
- Database Username - “app”
Once you are ready, go ahead and click on the Continue Button to begin the installation. This will bbring you to the standard installation progress screen as it installs DNN. In our walkthrough in this article we opted to use Azure SQL Servers Basic Pricing Tier which is slower especially with large amounts of SQL writes that happens during installation. This may take MUCH longer than you are used to. You could always just scale up the Azure SQL Server during installation and scale it down after, but that goes outside of the scope of this walkthrough. The installation took 7:39 minutes for me to complete.
Once the installation is completed you will have DNN running in Microsoft Azure Cloud!
Conclusion
Getting up and running with DNN in Microsoft Azure Cloud isn’t that difficult if you avoid the traps. Once it is up and running you get all the benefits that come with hosting in the cloud available for DNN.

