The Uno Platform Getting Started blog series is a blog series that I put together for October of 2020. It contains several articles that will help you get started building scalable enterprise applications in Uno Platform. Be sure to checkout all the blogs in the series by heading to the 1st article - Uno Platform Getting Started Series
When building cross-platform applications one of the most important features is platform specific features. Such as rendering particular controls on Android vs iOS vs WASM vs UWP vs etc. This gives the application developer the most control to conform to platform design best practices but work in a 100% shared code. Uno Platform has a very impressive API access for platform specific rendering, even in the XAML you can define controls that will only render on the platforms you want.
Documentation
The Uno Platform team did an amazing job with writing concise documentation on XAML based platform specific rendering.
Overview & How Does it Work
Platform specific XAML leverages custom XML Namespaces (xmlns) that Uno Platform renders for the different platforms. When implementing this technique you will need to make sure to ignore all non windows xmlns as UWP doesn’t know how to handle it.
The documentation has a complete list of what namespaces are available and what is required to be placed in the ignorable.
Platform Specific TextBlock
Let’s take a brand new Uno Platform application and add some platform specific TextBlock controls. As a starting point your MainPage.xaml file should look like the code snippet below:
1
2
3
4
5
6
7
8
9
10
11
12
<Page
    x:Class="PlatformSpecificXaml.MainPage"
    xmlns="http://schemas.microsoft.com/winfx/2006/xaml/presentation"
    xmlns:x="http://schemas.microsoft.com/winfx/2006/xaml"
    xmlns:d="http://schemas.microsoft.com/expression/blend/2008"
    xmlns:mc="http://schemas.openxmlformats.org/markup-compatibility/2006"
    mc:Ignorable="d">

    <Grid Background="{ThemeResource ApplicationPageBackgroundThemeBrush}">
        <TextBlock Text="Hello, world!" Margin="20" FontSize="30" />
    </Grid>
</Page>
Now that we are the same starting point let’s take a look how it we can add custom controls for the different platforms. As we add our xmlns to support platform specific rendering you will need to add them to the mc:Ignorable.
Android
To add a Hello World message that only displays on Android you will need to complete 2 steps
- Add xmlns for android and add it to the ignorable
- Add new control using the xmlns as a prefix
Add xmlns
Add the xmlns at the Page object declaration and don’t forget to add the ignorable. If you don’t include the ignorable you will have issues building on UWP.
1
xmlns:android="http://uno.ui/android"
Add the android xmlns reference to the ignorable statement
1
mc:Ignorable="d android"
As you add more xmlns the ignorable will grow, just add a space between each one. You will see how this works in the sections below.
Add New Control
1
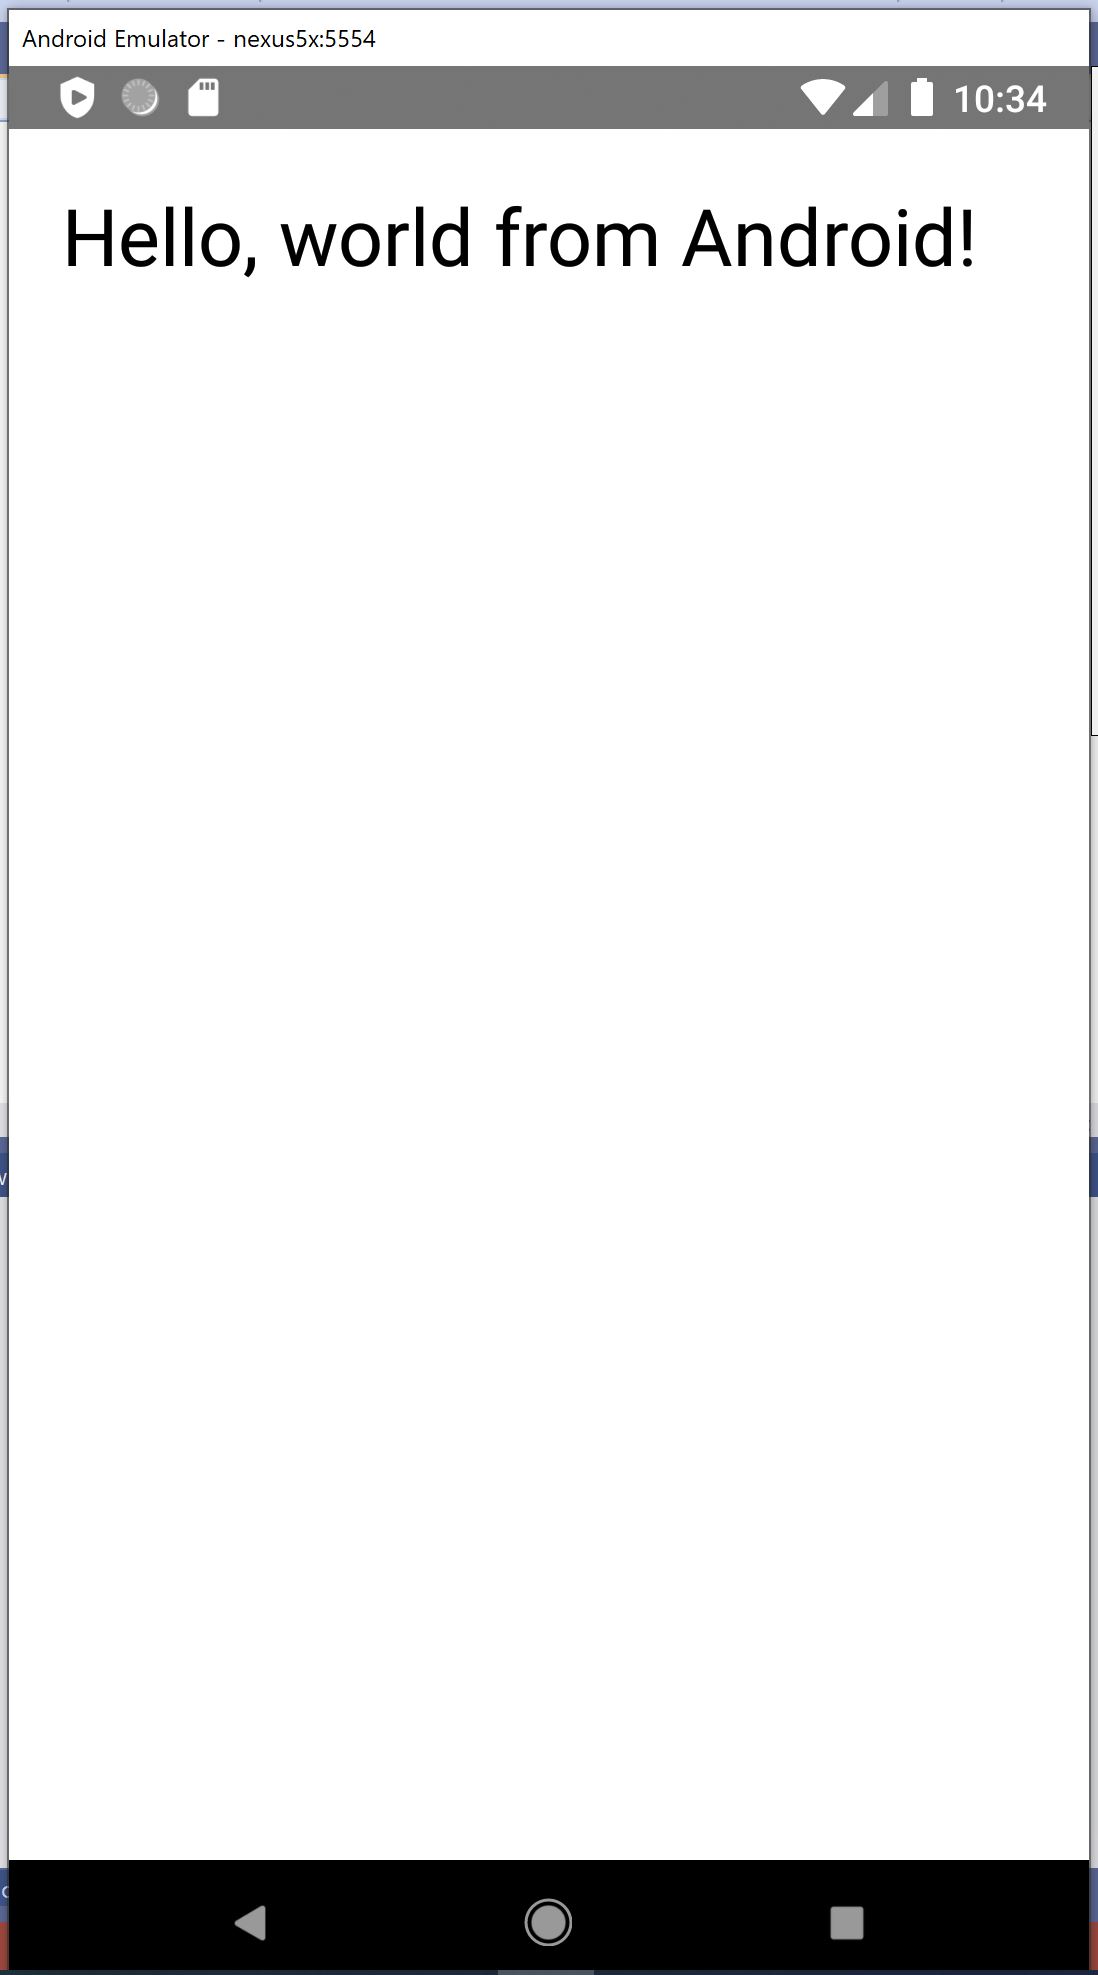
<android:TextBlock Text="Hello, world from Android!" Margin="20" FontSize="30" />
Current MainPage.xaml
Putting everything together your MainPage.xaml should look like this
1
2
3
4
5
6
7
8
9
10
11
12
13
<Page
    x:Class="PlatformSpecificXaml.MainPage"
    xmlns="http://schemas.microsoft.com/winfx/2006/xaml/presentation"
    xmlns:x="http://schemas.microsoft.com/winfx/2006/xaml"
    xmlns:d="http://schemas.microsoft.com/expression/blend/2008"
    xmlns:android="http://uno.ui/android"
    xmlns:mc="http://schemas.openxmlformats.org/markup-compatibility/2006"
    mc:Ignorable="d android">

    <Grid Background="{ThemeResource ApplicationPageBackgroundThemeBrush}">
        <android:TextBlock Text="Hello, world from Android!" Margin="20" FontSize="30" />
    </Grid>
</Page>
Android Screenshot
iOS
To add a Hello World message that only displays on iOS you will need to complete 2 steps
- Add xmlns for android and add it to the ignorable
- Add new control using the xmlns as a prefix
Add xmlns
Add the xmlns at the Page object declaration and don’t forget to add the ignorable. If you don’t include the ignorable you will have issues building on UWP.
1
xmlns:ios="http://uno.ui/ios"
Add the iOS xmlns reference to the ignorable statement.
1
mc:Ignorable="d android ios"
As you add more xmlns the ignorable will grow, just add a space between each one.
Add New Control
1
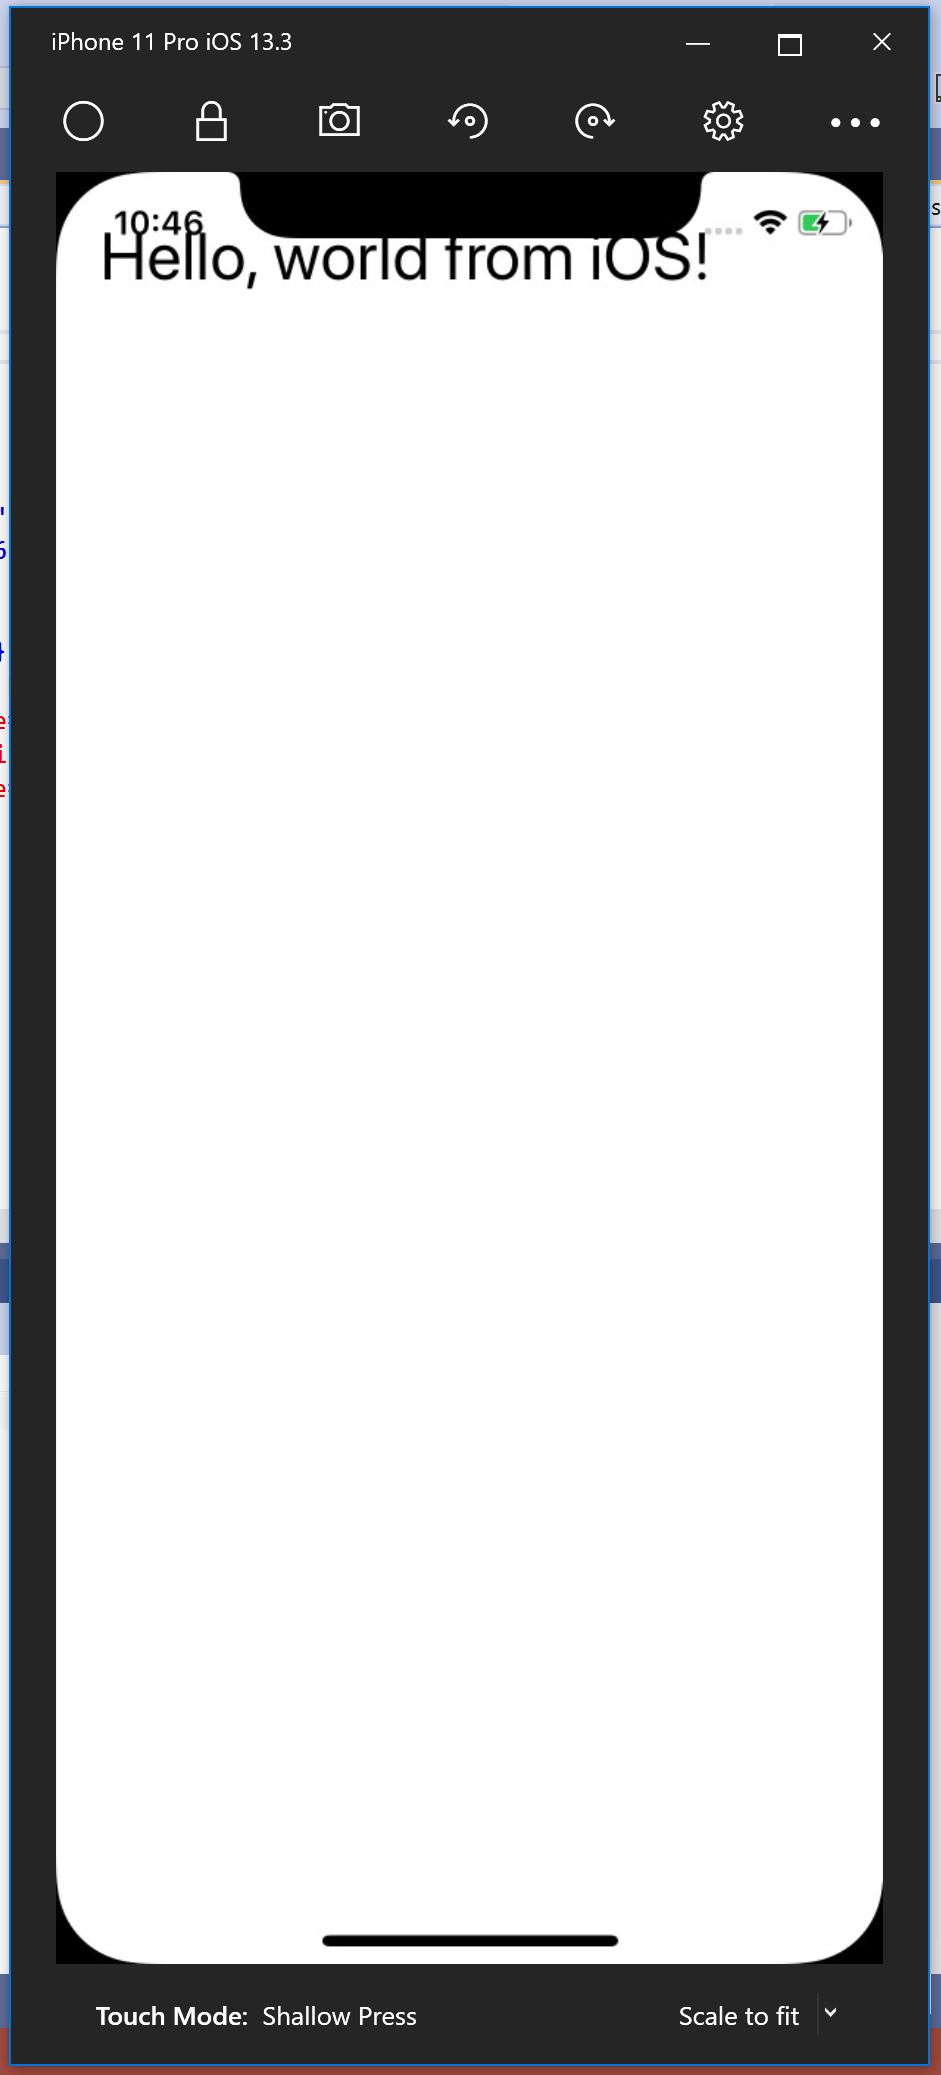
<ios:TextBlock Text="Hello, world from iOS!" Margin="20" FontSize="30" />
Current MainPage.xaml
Putting everything together your MainPage.xaml should look like this
1
2
3
4
5
6
7
8
9
10
11
12
13
14
15
<Page
    x:Class="PlatformSpecificXaml.MainPage"
    xmlns="http://schemas.microsoft.com/winfx/2006/xaml/presentation"
    xmlns:x="http://schemas.microsoft.com/winfx/2006/xaml"
    xmlns:d="http://schemas.microsoft.com/expression/blend/2008"
    xmlns:android="http://uno.ui/android"
    xmlns:ios="http://uno.ui/ios"
    xmlns:mc="http://schemas.openxmlformats.org/markup-compatibility/2006"
    mc:Ignorable="d android ios">

    <Grid Background="{ThemeResource ApplicationPageBackgroundThemeBrush}">
        <android:TextBlock Text="Hello, world from Android!" Margin="20" FontSize="30" />
        <ios:TextBlock Text="Hello, world from iOS!" Margin="20" FontSize="30" />
    </Grid>
</Page>
iOS Screenshot
WASM
To add a Hello World message that only displays on WASM you will need to complete 2 steps
- Add xmlns for android and add it to the ignorable
- Add new control using the xmlns as a prefix
Add xmlns
Add the xmlns at the Page object declaration and don’t forget to add the ignorable. If you don’t include the ignorable you will have issues building on UWP.
1
xmlns:wasm="http://uno.ui/wasm"
Add the WASM xmlns reference to the ignorable statement.
1
mc:Ignorable="d android ios wasm"
As you add more xmlns the ignorable will grow, just add a space between each one.
Add New Control
1
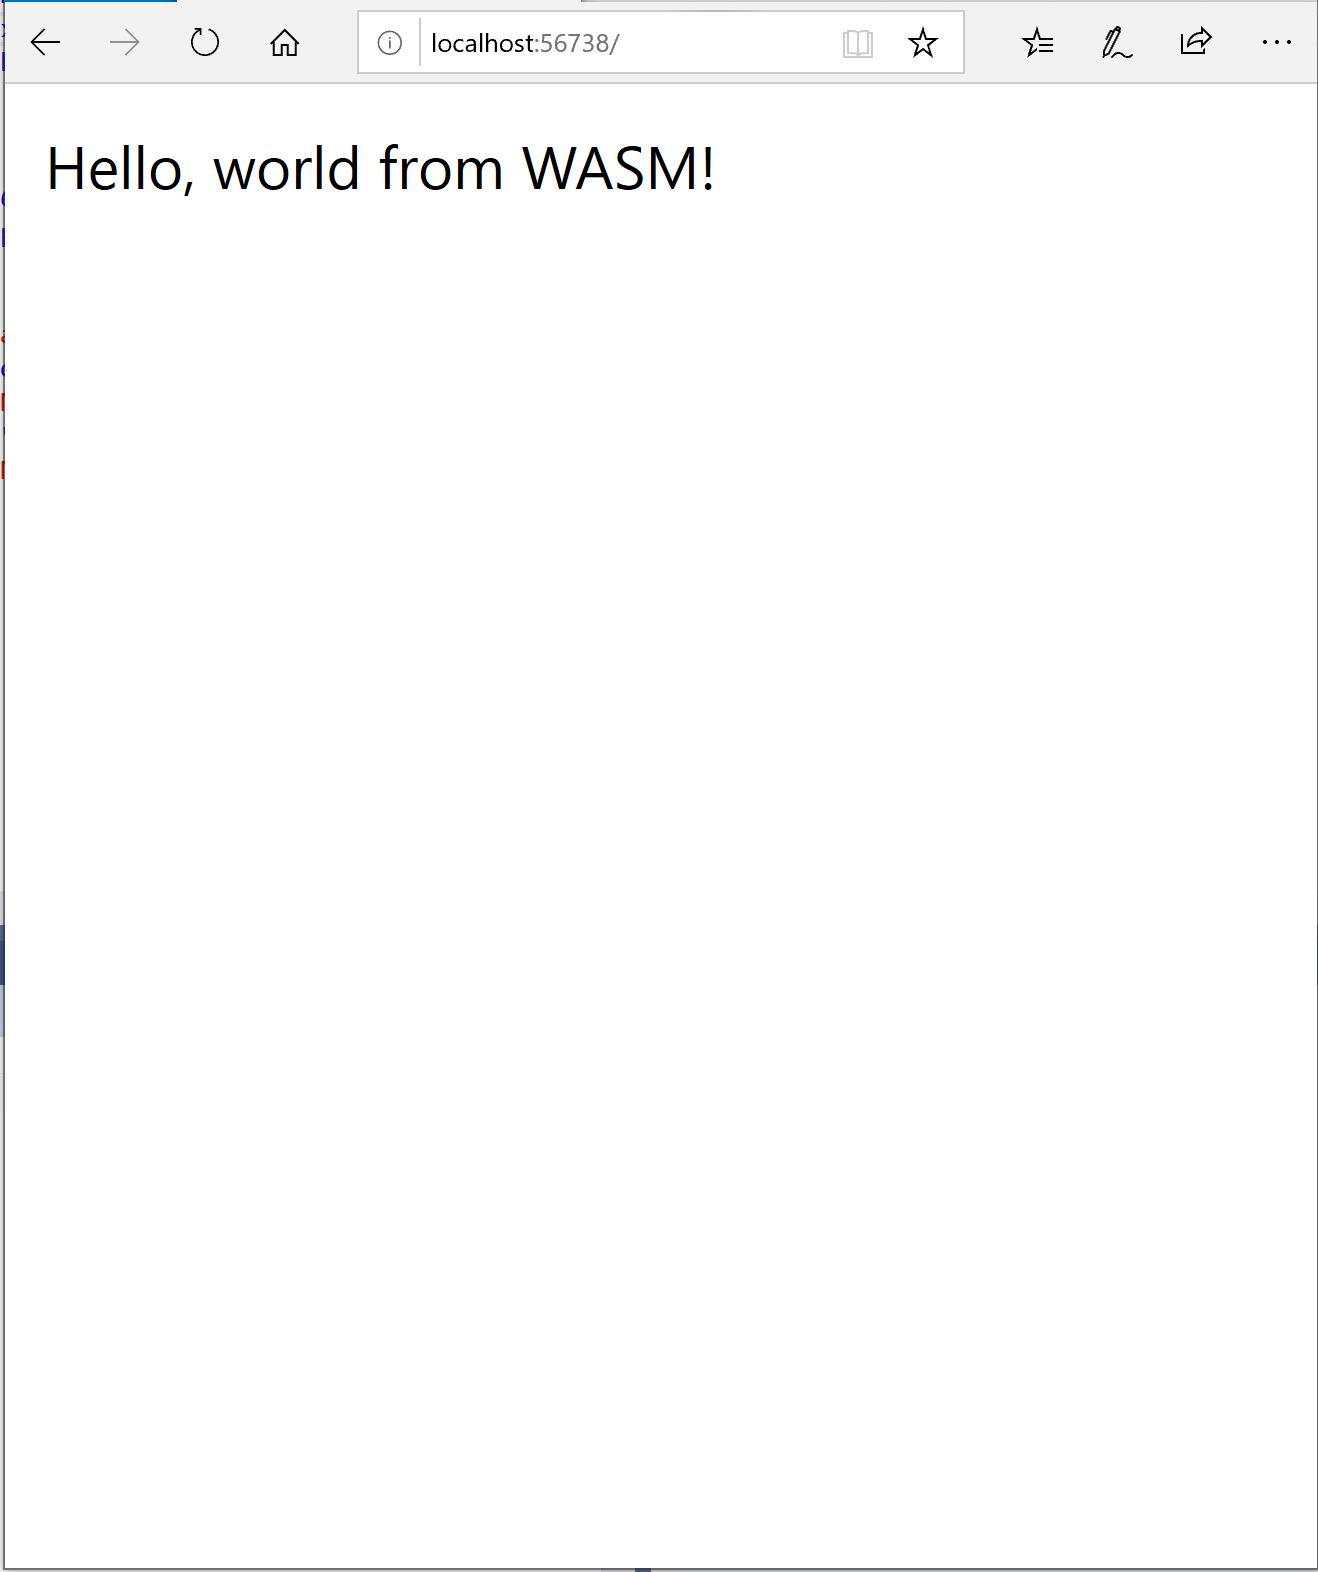
<wasm:TextBlock Text="Hello, world from WASM!" Margin="20" FontSize="30" />
Current MainPage.xaml
Putting everything together your MainPage.xaml should look like this
1
2
3
4
5
6
7
8
9
10
11
12
13
14
15
16
17
<Page
    x:Class="PlatformSpecificXaml.MainPage"
    xmlns="http://schemas.microsoft.com/winfx/2006/xaml/presentation"
    xmlns:x="http://schemas.microsoft.com/winfx/2006/xaml"
    xmlns:d="http://schemas.microsoft.com/expression/blend/2008"
    xmlns:android="http://uno.ui/android"
    xmlns:ios="http://uno.ui/ios"
    xmlns:wasm="http://uno.ui/wasm"
    xmlns:mc="http://schemas.openxmlformats.org/markup-compatibility/2006"
    mc:Ignorable="d android ios wasm">

    <Grid Background="{ThemeResource ApplicationPageBackgroundThemeBrush}">
        <android:TextBlock Text="Hello, world from Android!" Margin="20" FontSize="30" />
        <ios:TextBlock Text="Hello, world from iOS!" Margin="20" FontSize="30" />
        <wasm:TextBlock Text="Hello, world from WASM!" Margin="20" FontSize="30" />
    </Grid>
</Page>
WASM Screenshot
UWP
At this point we have a custom Hello World message working for all the platforms except UWP. Let’s follow the same technique and implement it for UWP by following these 2 steps
- Add xmlns for android and add it to the ignorable
- Add new control using the xmlns as a prefix
Add xmlns
Add the xmlns at the Page object declaration. This xmlns declaration does not need to be added to the ignorable as it is a supported UWP xmlns.
1
xmlns:win="http://schemas.microsoft.com/winfx/2006/xaml/presentation"
Add New Control
1
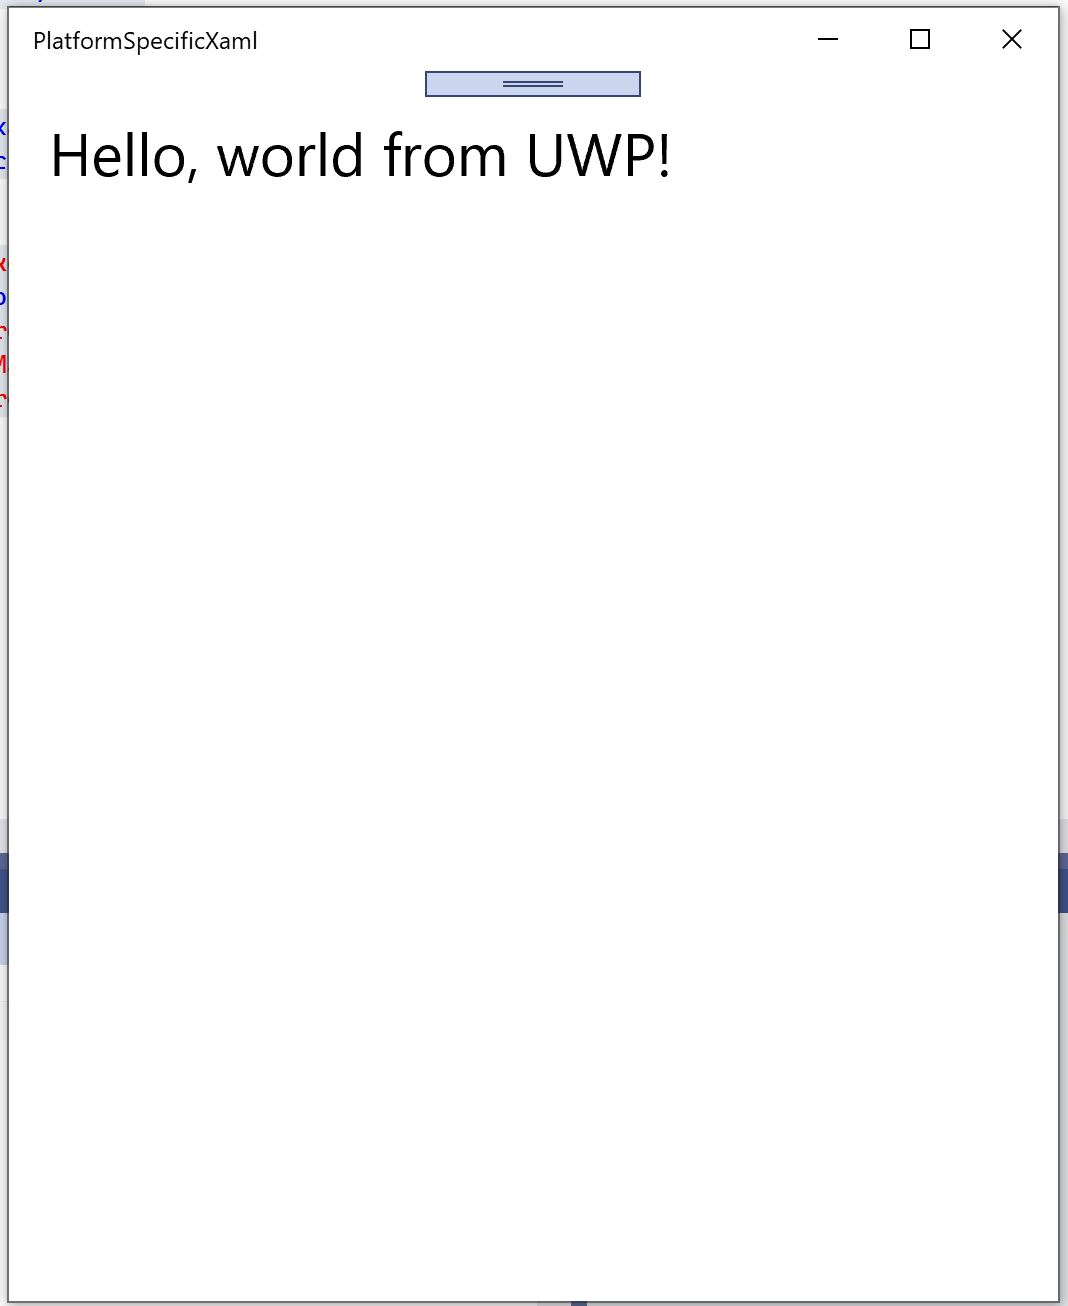
<win:TextBlock Text="Hello, world from UWP!" Margin="20" FontSize="30" />
Current MainPage.xaml
Putting everything together your MainPage.xaml should look like this
1
2
3
4
5
6
7
8
9
10
11
12
13
14
15
16
17
18
19
<Page
    x:Class="PlatformSpecificXaml.MainPage"
    xmlns="http://schemas.microsoft.com/winfx/2006/xaml/presentation"
    xmlns:x="http://schemas.microsoft.com/winfx/2006/xaml"
    xmlns:d="http://schemas.microsoft.com/expression/blend/2008"
    xmlns:android="http://uno.ui/android"
    xmlns:ios="http://uno.ui/ios"
    xmlns:wasm="http://uno.ui/wasm"
    xmlns:win="http://schemas.microsoft.com/winfx/2006/xaml/presentation"
    xmlns:mc="http://schemas.openxmlformats.org/markup-compatibility/2006"
    mc:Ignorable="d android ios wasm">

    <Grid Background="{ThemeResource ApplicationPageBackgroundThemeBrush}">
        <android:TextBlock Text="Hello, world from Android!" Margin="20" FontSize="30" />
        <ios:TextBlock Text="Hello, world from iOS!" Margin="20" FontSize="30" />
        <wasm:TextBlock Text="Hello, world from WASM!" Margin="20" FontSize="30" />
        <win:TextBlock Text="Hello, world from UWP!" Margin="20" FontSize="30" />
    </Grid>
</Page>
UWP Screenshot
Conclusion
You know should have a basic understanding of how to leverage platform specific XAML in your Uno Platform projects. This article is just a taste of the different xmlns you can add to give you additional power. I recommend taking a look at the official Uno Platform documentation as it provides great insights on how you can leverage different xmlns combinations for different use-cases.
If you had trouble getting this working on your own, take a look at the code sample that I have published to GitHub:
-Happy Coding


